How to Deploy a Node.js Application to AWS Using Docker, AWS ECR, and AWS App Runner

In this article, I’ll be walking you through how to create a simple Node.js and Express.js server, then create a docker image of that application, push that image to AWS Elastic Container Registry (ECR), and then use that image to deploy that simple application using AWS App Runner.
AWS App Runner service is a platform for quickly and easily deploying an application, both backend and frontend, to the web without needing to spend hours, days, or etc. trying to work on configs and pipelines. This service kind of fills the void that AWS had for being able to easily deploy proof of concept applications and the like, such as you might do with Heroku, Digital Ocean, or etc.
If you aren’t overly familiar with AWS or don’t have an account setup, then that part is going to require some intermittent steps. Don’t worry, I’ll send you all the links for the steps to get your account set up so that you can deploy.
Note: In this article, I will be giving you a handful of links for you to complete certain steps along the way, especially on the AWS side. The reason for that is two-fold. One, I don’t want steps such as signing up for an AWS account to detract from the article’s focus, especially for users who may have already done this in the past. Two, tech, and especially AWS as some of you may know, changes quite often. In an attempt to keep this article more relevant for a longer period, I have decided to link to their documentation rather than walk you through every single step of it. However, I will note any pitfalls or catches that you may run into along the way.
Note: I am using a MacBook, so I won’t be covering Windows-specific instructions in this article.
Note: AWS provides hundreds of services and all of those services are hosted in various server farms that AWS owns. They are separated by regions, and therefore we need to be cognizant of what services we are creating, and in what regions. Sometimes this is not as critical, and sometimes it is something you need to be mindful of. With that said, users created in any region can interact with their services in other regions, so we don’t have to worry there, but it will become important when we want to give Docker CLI permission to push images to our private ECR repository later on. I will remind you at that step, but keep this in mind.
What you will need:
AWS account
AWS CLI
Docker Desktop for your OS (Mine is a Mac)
Docker CLI
IDE of your choosing (I’m using Visual Studio Code 2)
Summary of Steps:
Create the Node.js and Express.js server
Test your server locally
Create your Dockerfile
Create a Docker account
Download and Install Docker Desktop for your OS, this will also install Docker CLI
Ensure you have Docker CLI installed and it is accessible
Use Docker CLI to create a Docker image
Use that created Docker image to create a container
Test your server through the Docker Container
Create an AWS account
Create a non-root user for your AWS account and set up SSO login for that non-root user
Download and Install AWS CLI
Configure AWS CLI to leverage SSO to log in using your new non-root user
Use SSO to log in to AWS CLI
Create a private AWS ECR repository
Use the AWS CLI to give Docker CLI permissions to push to your private ECR registry
Tag your image with the Amazon ECR registry
Use Docker to push your image to your ECR repo
Configure an AWS App Runner service and deploy your image to your App Runner Instance
Test your deployed application
So there it is. Let’s get started!
Create the Node.js and Express.js server
Nothing crazy here. We are focusing on the deployment process, so we are keeping the app simple. Node.js, Express.js server with one endpoint.
In your terminal, run:
mkdir <your_application_name> && cd <your_application_name>
then,
npm init -y
Once you have finished setting up your base package.json, let’s move on.
In your your terminal, run:
touch index.js
Next, you will need to install the Express.js library as a dependency. In your terminal, run:
npm i -S express
Now, open your new project in your favored IDE, and you will need to add a few items to your package.json file.
Add the type property so we can leverage ES imports
"type": “module”
Add the start property in the scripts section
"start": "node index.js”
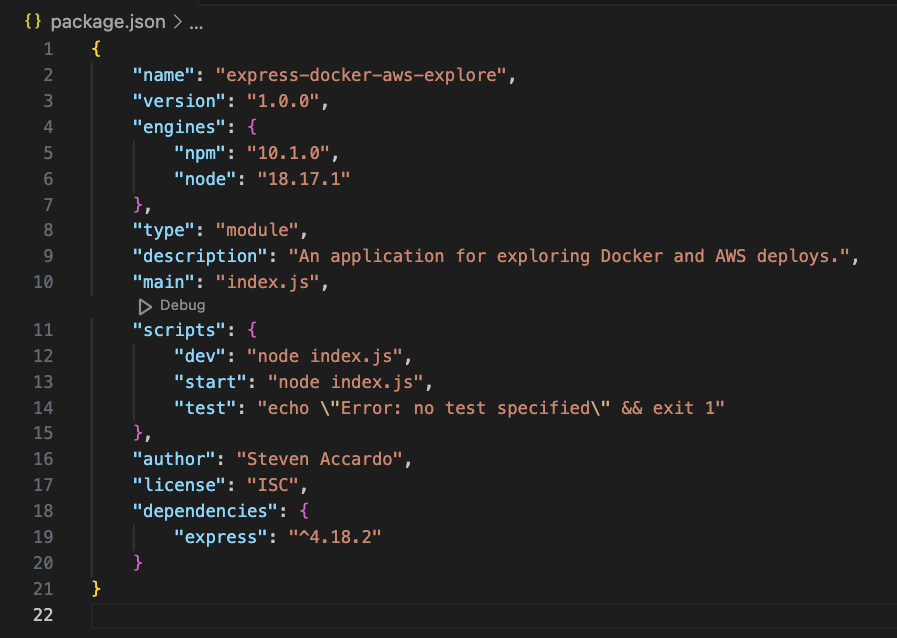
Create a simple server in your index.js
import express from 'express';

const app = express();

app.get('/', (req, res) => {
  res.send('Hello! You found me!');
});

const port = process.env.PORT ?? 4000;
app.listen(port, () => console.log(`Server is listening on port: ${port}`));
Test your server locally
Let’s start the server and check out endpoint via the browser.
In your terminal, run:
npm start
In your browser, go to http://localhost:4000 . Ensure that you see your message in the viewport and ensure you can see the console.log message in your terminal.

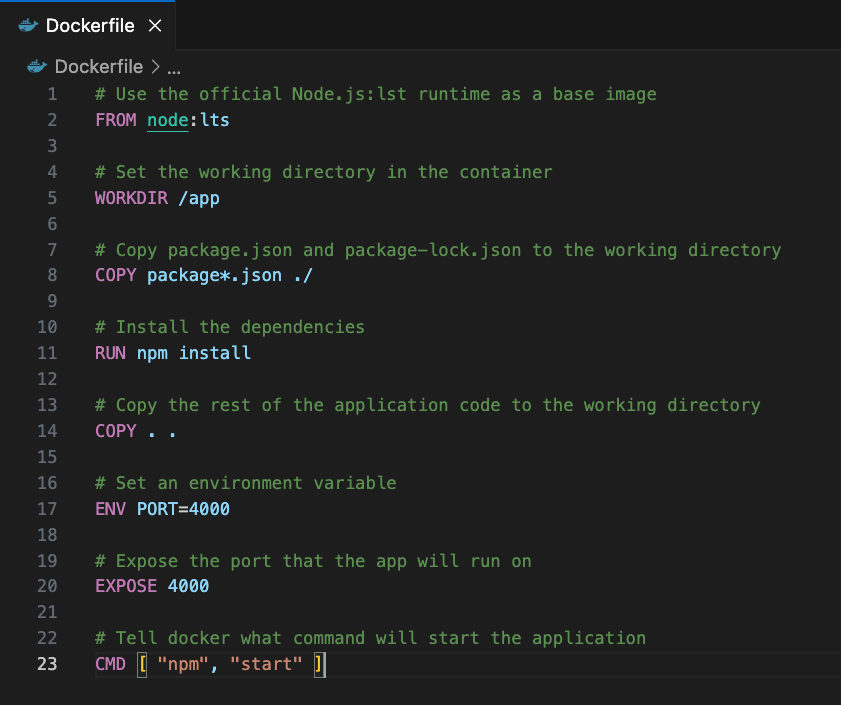
Create a Dockerfile
In your terminal, at the root of your application directory, run:
touch Dockerfile
Add some basic items to your Dockerfile. You can use the basic config below.
# Use the official Node.js:lst runtime as a base image
FROM node:lts

# Set the working directory in the container
WORKDIR /app

# Copy package.json and package-lock.json to the working directory
COPY package*.json ./

# Install the dependencies
RUN npm install

# Copy the rest of the application code to the working directory
COPY . .

# Set an environment variable
ENV PORT=4000

# Expose the port that the app will run on
EXPOSE 4000

# Tell docker what command will start the application
CMD [ "npm", "start" ]
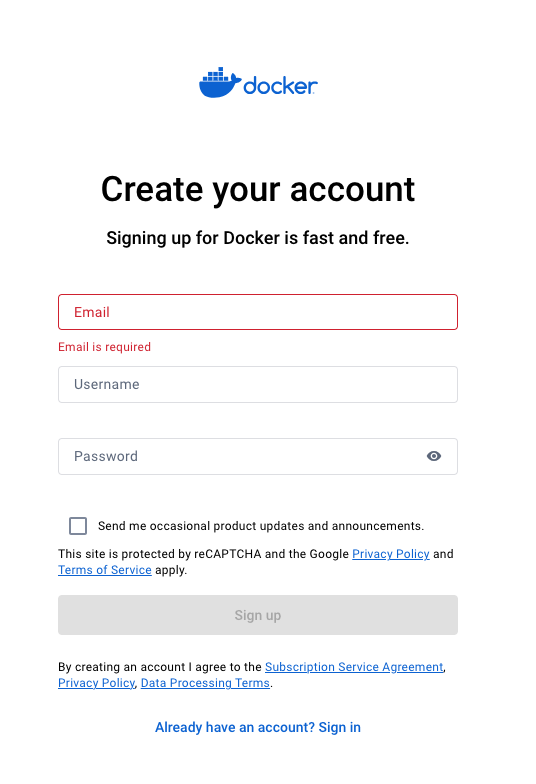
Create a Docker Account
You will need to sign up for a Docker account. You can do this at https://hub.docker.com/signup .
Download and Install Docker Desktop for your OS
Now that you have created your Docker account, you will need to download Docker Desktop, which will also install Docker CLI. You can download Docker Desktop here https://docs.docker.com/get-docker .
Once Docker Desktop is installed, start Docker Desktop and log in. This will pop open a browser window for authentication.
Ensure you have Docker CLI installed and it is accessible
In your terminal, run:
docker --version
You should see your terminal output a version of Docker. This will confirm that it was installed correctly, and is ready to use.
Use Docker CLI to create a Docker image
You will now need to log in to your Docker account using the Docker CLI. In your terminal, run:
run docker login —username=<your username>
Once you complete authentication, you should be logged in to the Docker CLI. You are ready to build your Docker image from the Dockerfile you created earlier.
In your terminal, at the root of your application directory, run:
docker build . -t <your-docker-username>/<your-application-name>
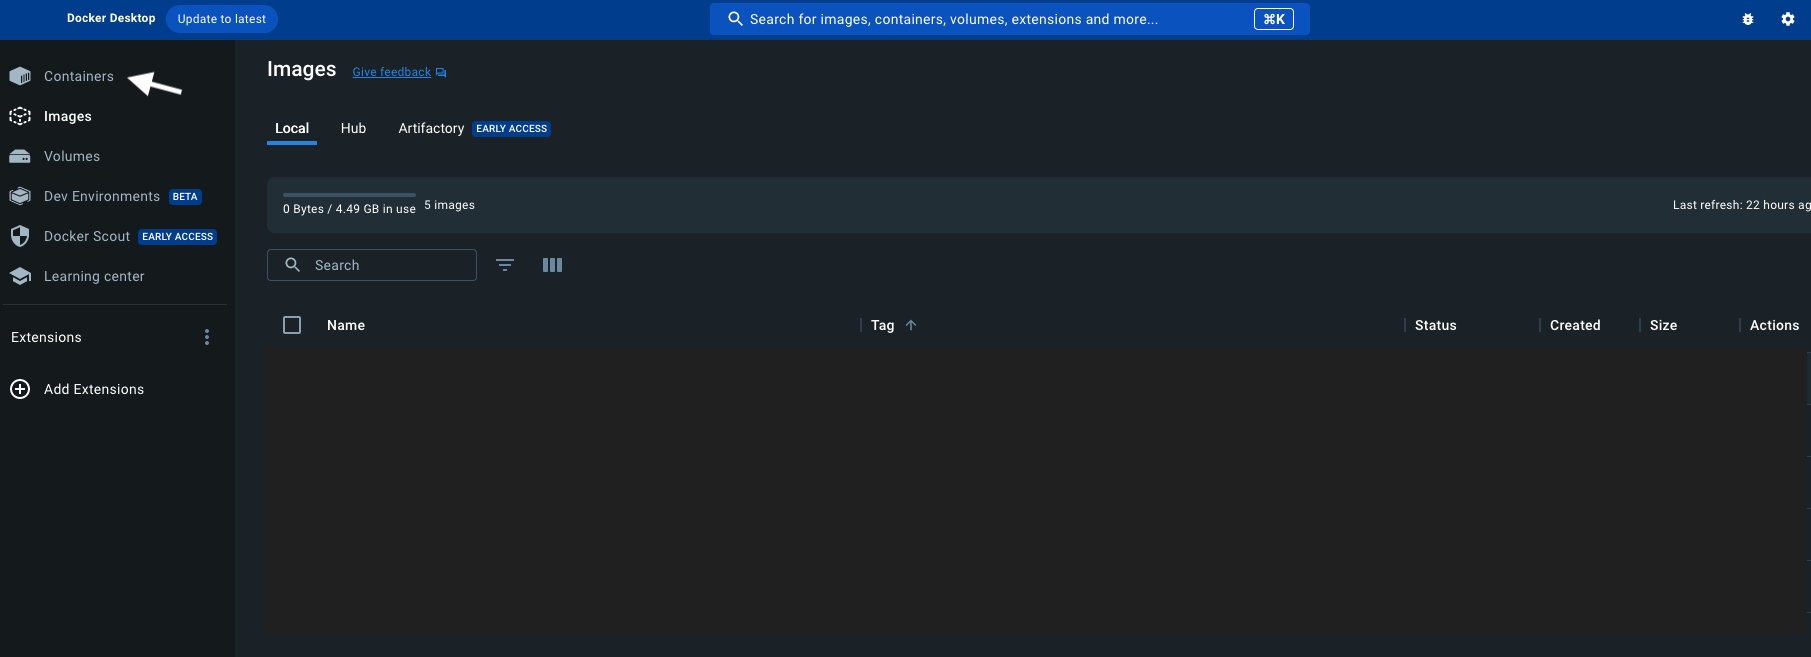
You should see the terminal start to build the docker image. When it is complete, go to your Docker Desktop and click the tab on the left titled “Images”. You should see your newly created image.

Use that created Docker image to create a container
Now, you will want to create a Docker container out of that image to ensure that a container can successfully be built from your image. This will save you troubleshooting later on if your application doesn’t work once we push it up to AWS. So, you will create a container from the images, run the container, and test it again to make sure your application server is up and the correct ports are exposed.
Note: Below is the command for creating/running a container from an image. In that command you will see 4000:4000. This is called port-forwarding. We will tell Docker to expose port 4000 of the container for incoming requests (the left side of the colon), which is the port our browser will make a request to. Then to forward that incoming request to port 4000 of our server application, which we told the server to listen on in our example code above.
In your terminal, run:
docker run -d --name <name-you-want-to-give-the-container> -p 4000:4000 <image-name>
You should see your terminal start to output information in regards to building that container. When it is complete you can go to your Docker Desktop, and click the left-side tab titled “Containers”. You should see your newly created container there, which should be running.
Test your server through the Docker Container
In your browser, go to http://localhost:4000 and you should see your server endpoint message displayed, just as we saw in the local test earlier.
Great, now we know our image was created properly and a container can be created from that image. Now it’s time to switch over to AWS.
Create an AWS account
You now need to create an AWS account. You can do so by going to this link https://aws.amazon.com .
Once you have completed the signup flow, you should have a root-level user for your account. Log in as that root-level user.
Create a non-root user for your AWS account
At this point, you (and AWS) are going to want you to create a non-root user. This is a 7-step process that basically has your root user create a secondary user that has access to all, or some, of the services in your AWS account and can use those services based on the permissions that you give it.
The idea behind creating the secondary user is so that it doesn’t have access to all of your AWS account abilities, and therefore someone can’t nefariously charge your account, delete services, and etc. It’s best practice to only allow this secondary user the lowest level permissions it needs to get the job done, such as setting the permissions to developer permissions instead of full administrator permission. That said, for ease of this example, I’m going to create a user with administrator permissions.
Note: The link below shows 8 steps, but we are going to skip step 7, which is setting up account access for additional users. We don’t need to do that for this tutorial at the moment.
Here are the instructions for the 7-step process for creating that secondary user:
https://docs.aws.amazon.com/singlesignon/latest/userguide/getting-started.html
At this point, you should have a secondary user with whatever permissions you have selected, and you should have set up SSO through AWS IAM Identity Center. If so, let’s move on.
Download and Install AWS CLI
Now we need to download and install AWS CLI for your OS to allow us to interact with your AWS account from the command line.
Again, I will point to AWS documentation for doing this. It’s straightforward:
https://docs.aws.amazon.com/cli/latest/userguide/getting-started-install.html
Configure AWS CLI to leverage SSO to log in using your new non-root user
Now we need to configure AWS CLI. This essentially means we need to create a profile via AWS CLI that will be stored on your local machine and contains all the necessary permissions to allow you to log in using SSO, and to give you access to all of the services that you have permissions for.
AWS has made this easier for us by providing an AWS CLI command: aws configure sso.
Note: When creating your profile during step 6 of the process in the below link, you may want to name it “default” so that you don’t have to specifically enter a profile name each time you use an AWS CLI command.
Here is the link for creating the SSO session and profile for being able to authenticate in the AWS CLI:
https://docs.aws.amazon.com/cli/latest/userguide/sso-configure-profile-token.html
Once you have created your SSO session config and your profile via AWS CLI, you are ready to log in via the AWS CLI.
Use SSO to log in to AWS CLI
In your terminal, run:
aws sso login
This will use that profile and SSO session config that you just created to log you in.
Create a private AWS ECR repository
We are starting to get some movement, hang in there!
You now are ready to create a private ECR repo, which will be the repo that you push your earlier created docker image to.
This is simple, and you can follow the steps here:
https://docs.aws.amazon.com/AmazonECR/latest/userguide/repository-create.html

Use the AWS CLI to give Docker CLI permissions to push to your private ECR registry
So at this point, we have everything ready to go, and we are ready to push our image to ECR. Well, how do we do that?
Note: The Docker CLI doesn't support native IAM authentication methods.
Docker being the industry standard container platform, AWS has made available a couple of options to assist in allowing us to give Docker CLI access to our private ECR repos. The method we will use here is an AWS CLI command, which is outlined in the link below:
https://docs.aws.amazon.com/AmazonECR/latest/userguide/docker-push-ecr-image.html
We will be using the AWS ECR get-login-password command. This command retrieves an access token on our behalf and decodes it in order for it to be piped into the Docker CLI login command.
Note: The region that you retrieve the token from MUST BE the same region that you created the private ECR repo in, if they do not match you will not be able to push your image to the ECR repo.
Note: Ensure the —username flag below is set equal to AWS, as in the example code below. This is correct, and required.
In your terminal, run:
aws ecr get-login-password --region <region-of-your-ecr-repo> | docker login --username AWS --password-stdin <your-numerical-aws_account_id>.dkr.ecr.<region-of-your-ecr-repo>.amazonaws.com
This creates a new auth entry in your local ~.docker/config.json files that Docker CLI will leverage to push and pull images to and from your ECR repo. The token you just leveraged is only good for 12 hours, so keep that in mind. If you need to push an image again after that time, you will just need to repeat this step again.
Tag your image with the Amazon ECR registry
Next, we need to tag our image for the private ECR repo, but first let’s print our images to the terminal. You may only see the one image you created earlier if this was your first go at it.
In your terminal, run:
docker images
You should see the image you created. including the alphanumeric docker image id.
Then in your terminal, run:
docker tag <your-alphanumeric-image-id> <your-numerical-aws_account_id>.dkr.ecr.<region-of-your-ecr-repo>.amazonaws.com/<name-of-your-private-ecr-repo>
Then in your terminal, run:
docker images
You should see the new image tagged properly.
Use Docker to push your image to your ECR repo
We are almost there!! Only a few more steps! Woohoo! Now, it’s time to push your docker image to the ECR repo.
In your terminal, run:
docker push <your-numerical-aws_account_id>.dkr.ecr.<region-of-your-ecr-repo>.amazonaws.com/<name-of-your-private-ecr-repo>
You should see your terminal start to push the image to the repo. Once it is complete, go to your AWS console as the non-root user and check the private ECR repo that you created. Click “Images”, and confirm that the image is there.
Configure an AWS App Runner service and deploy your image to your App Runner Instance
Now that our image is in the ECR repo we can deploy it to an AWS App Runner service, but first, we need to create that service.
Using your non-root user search for the AWS App Runner service. You will need to create a new App Runner Service the steps can be followed here:
https://docs.aws.amazon.com/apprunner/latest/dg/manage-create.html

During the process of creating the service, you will be asked to provide the repo where the image is stored.
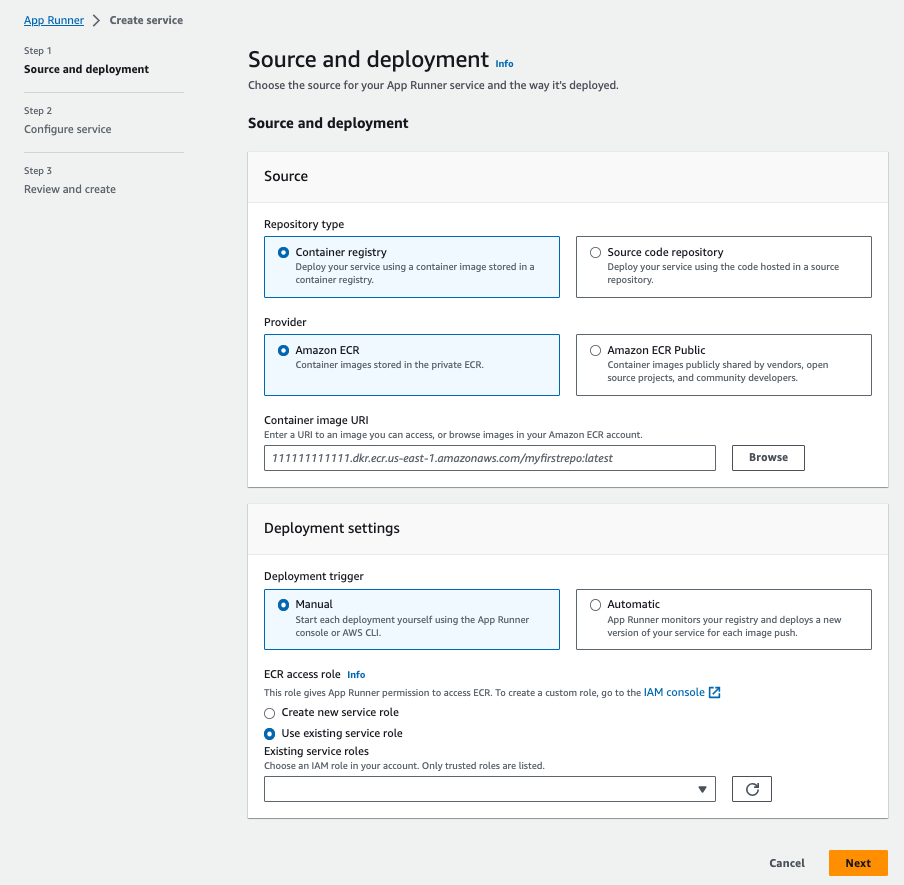
Note: AWS not only requires users to have permissions to access services, but also requires other services to have permissions to access other services.
You will also be asked whether you want to use an existing service role or a new role. If this is your first time granting roles to services, then you will choose to create a new role. Through this process, AWS will grant a service-based role to your new App Runner service so that it has permission to access the private ECR repo where your image is held.
When you get to the configure service step, you get to choose your virtual CPU & memory allocations as well as the autoscaling settings. Since the URL that the application is deployed on will technically be available to the public, I would advise setting all of these options to their minimum values so that in case you forget to stop the service, you won’t be at risk of running up a large bill with AWS. That would not be fun.
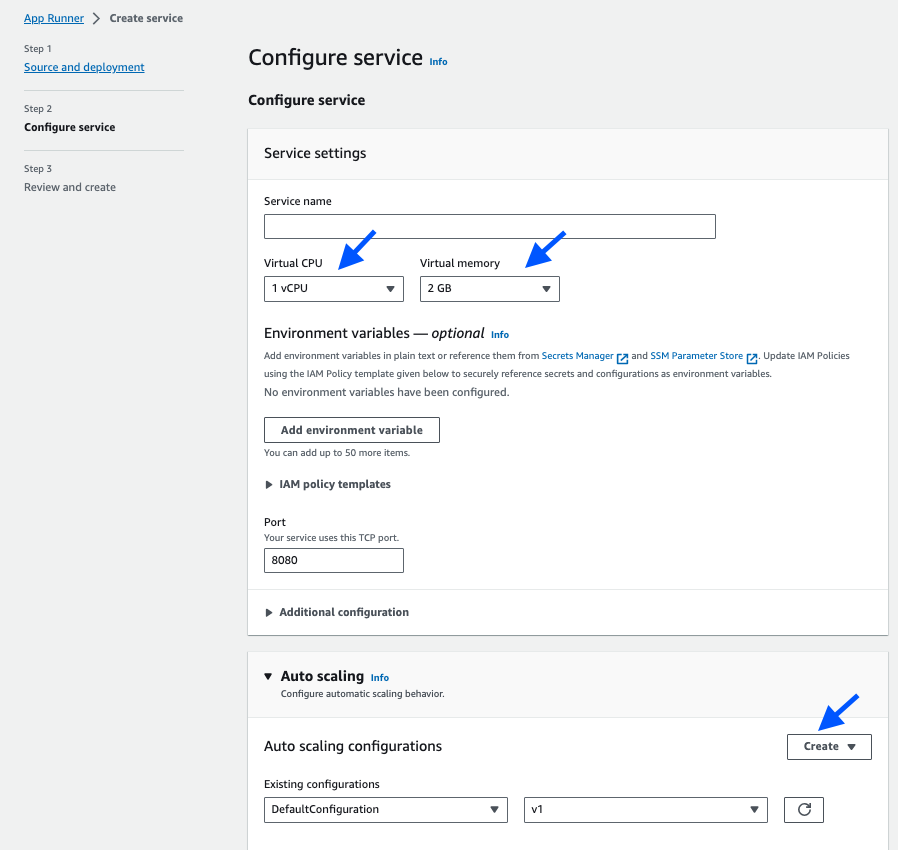
After reviewing your configuration for the App Runner, you will click “Create and Deploy”. The service will then send you to your new App Runner detail page, and you will see “Operation in Progress”. The service isn’t deployed until that status changes to “Running”.
Test your deployed application
Now, the last step is to click on the URL below “Default domain”, which will open a new browser window tab. Confirm that you see your application’s endpoint message in the browser viewport.
Viola! You did it! Great job!
If this was your first time working with AWS, I know this was a long sequence for you. This is part of the price you have to pay for leveraging their service, and we have to accept the security that comes along with it. Even at a hobby level.
That said, this is also very powerful because you are all set up to be able to deploy both backend and frontend applications whenever you would like with only a few commands and steps. This same process can be used to deploy your applications to EC2 and Kubernetes instances as well, obviously by changing where you deploy the image in the private ECR repo instead of an App Runner instance.